
Start at your notebook checkpoint
Use the day and time shown in your notebook rather than guessing from a room: the same rooms return with different objects. There are several assignments within a time period, so match the task name as well. The stage index jumps directly to the next objective and its completion signal.
If your breakfast cabinet opens with 235 and contains sugar, follow the Lite and demo walkthrough. This premium route instead uses 243 later, during Preparing the Reception, to obtain a candle. Do not carry a preview password into a different assignment.
Optional actions can become unavailable when an animal leaves or a scene ends. Use the achievements guide before advancing if you want those extras on your first run. After finishing, Continue and the notebook let you revisit chapters.
On a narrow screen, scroll the table sideways to read all columns.
Day 1 · Morning
The Arrival. Open the carriage curtains and get out. Take the carrot and the two loose tin cups—one from the left window and one from the carriage compartment. Put the cups at the right window and order all five by stripe count, 1 to 5, to obtain a coin. Feed the horse and pay the coachman. When the carriage leaves, take the iron bar, pry up the loose board by the planter and use the revealed key on the front door. Sign Kate’s contract with the feather dipped in ink.
Preparing Breakfast. Collect the milk, pot and dead mouse near the back stairs and Aldous’s room. Give the mouse to the cat to uncover matches; collect wood and oats in the servant’s room. Heat milk and oats in the pot on the lit stove, then take the porridge. The porridge guide gives the object locations and the difference from the sugar-based demo recipe.
Waking Up Aldous. Open his bed curtains and fit the Toy Soldier’s hand to the alarm at 7:00. Open the patterned shaving box for the razor, take the cloth behind the hanging clothes, shave him and clean his ear. Give the removed earlobe to the window bird for a drawer key; use the berries from that drawer to trap the bug in his porridge, then feed him. Put on both slippers before the exercise sequence. Dress him in shirt, vest and bow, then tap the approaching carriage through the window.
Day 1 · Afternoon
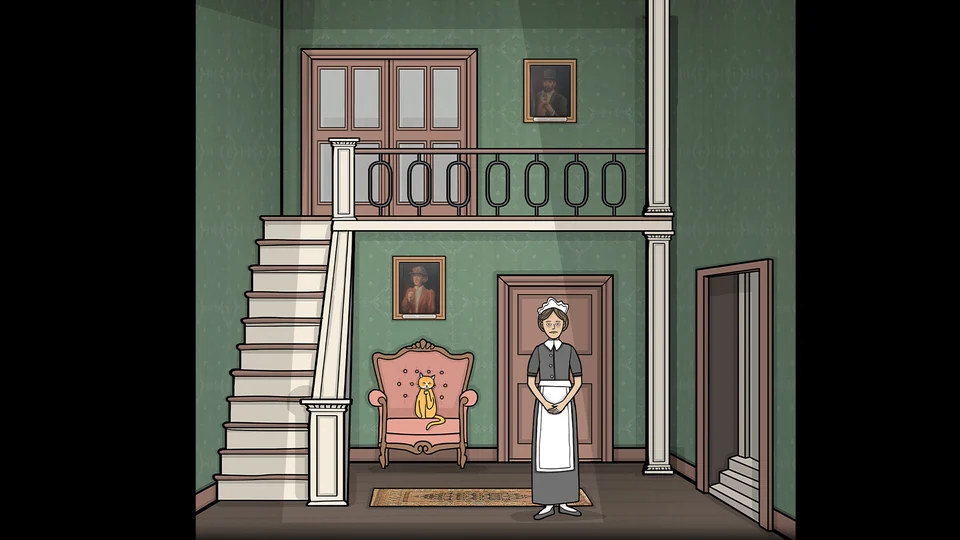
Preparing the Reception. Wipe the dirty floor patches with the cloth and talk to Kate for a duster. Dust the three family portraits; their numbers, in the cabinet’s Alexandra–Aldous–William order, are 2–4–3. Take the candle from that box and gather the other two loose candles. Add them to the chandelier. With candle positions counted from left to right, light 3, 1, 4, 2, 6, 5. The Small Repairs achievement belongs to an extra picture-frame interaction during this task.
Welcoming the Guests. In the garden, solve the flower puzzle for a bouquet and stone tablet. Milk the goat into the jug; its kick exposes a small mailbox key. Open the mailbox for a letter and another tablet. Move the arrow-marked stone beside each cockroach so it retreats toward the black hole; trapped insects require a reset. The last tablet comes from clearing all six. Arrange the three tablets in the garden stone box and raise the flag it releases.
Unload Alexandra’s basket and suitcase, help her down by taking her hand, and give her the bouquet. Tilt the baby’s basket to read 374, enter it on the suitcase and release both clasps. Fit the clothing into the case to reveal the wallet. Give its coin to the coachman and its bill to the horse, then speak to Alexandra to finish welcoming her.
Day 1 · Evening
Serving Tea. Collect tea, sugar and hot water in the servant’s room and the cup near Aldous’s room. Get glue from the cat before repairing Alexandra’s first broken cup. Serve tea, hot water and the garden’s goat milk; after the rejected cup is repaired, add two portions of sugar to the replacement serving. For the optional green-powder drink, read Matcha Latte before making the cat cough up glue.
Opening the Reunion. Enter the room left of the crate once Alexandra accepts her tea. Retrieve Aldous’s glass and open the champagne box with 1753. Let William through the window and give him champagne; rebuild his broken bottle to reveal the arrow used on the cigar box. Give him the cigar and work the saliva through his mouth to extinguish the flame. Prepare three fish toasts using the fish painting, fireplace and fly eggs. Give Aldous his spoon to begin the speech, resolve James’s crying sequence, then wake the dozing William. The living-room walkthrough covers these interactions through the end of the reunion; soothing the baby distinguishes its two different baby interactions.
Day 1 · Night
The Night Watch. Kate gives you a bell and three candles. Make a complete patrol of the available hallway views. Ring the bell if anything is abnormal; when the whole patrol is normal, extinguish one candle. Repeat until all three are out. Wrong reports reset progress, and the anomaly order is not a fixed code.
Searching the Attic. William sends you for a scroll and provides a Walking Stick. Use it on the ceiling hatch near Aldous’s room and climb up. Sort the desk objects for a candle, light the lantern, solve the figurine story box, collect the animal statues and reproduce the window constellations. The habitat box gives the scroll and a ladder rung; combine that with the other rung to repair the ladder and open the upper hatch. Follow the first-night attic guide for the box clues and exact normal-progression constellations.
Day 2 · Morning
Preparing Coffee. The house painting shows the three siblings’ movements. Count Alexandra’s three upward windows, Aldous’s one rightward window and William’s five leftward windows to open the bean box with 315. Grind the beans, put the grounds into the coffee pot and pour coffee for Aldous at his door. Roasting the beans on top of the stove before grinding is optional. Kate then opens William’s room.
Waking Up William. Set the grandfather clock to the 9:00 shown by his pocket watch to move the cat. Match the clock-box symbols to the family painting for a chalice. Collect saliva, grow the bird seed, obtain a feather and follow William’s toe movements to get the key. Eye drops and coffee wake him; rainwater grows another seed, which produces an egg for his breakfast. The William guide explains this dependency chain and the scroll picture order. Finish reading the scroll with him to receive the request for two more timepieces.
Day 2 · Afternoon
Cleaning the Floors. Take Kate’s scrubber. Clear the three patches by following the numbered specks, the directional trail and the matching pairs in their respective views. Finish the last stain before returning to her. The bathroom keyhole and the balcony beyond Aldous’s room become useful at this stage.
Going Hunting. Take the rifle and ammunition at the stump. Find the pheasant, pigeon, boar, rabbit and deer; the boar and rabbit first need their hiding places disturbed. Return to the stump for ammunition when needed. On the meat table, match eye, snout, claw, tongue and ear to the numbered moving parts to obtain 91276. Open the shed, take the knife and cloth, and give Aldous the knife. Collect the Silver Timepiece from his bag before wiping his bloody face. See the meat puzzle for the sensory matches.
Day 2 · Evening
Doing the Washing. Collect all seven laundry items, including the diaper Kate gives you when you hold James. Wash them in the hot-water tub in the servant’s room and hang them on the balcony in this order: shirt, boxers, cloth, jeans, four-stripe sock, five-stripe sock, towel. Take the bathroom key from the shirt pocket.
Helping with Bathing. Fill the bath with the retained hot water. The table’s sliding box provides soap; the wall’s association tiles provide scissors. Obtain Alexandra’s hairpin and use the cookie, mouse and maggot interaction to make a bone comb. Once she is bathing, follow the bubbles’ tiny directional dots and repel the emerging hand with the pin. Cut off her necklace. Lay out the three letters so the X marks cross out digits, leaving 281 for the briefcase; use the pendant on the inner box for the Bronze Timepiece. The bathroom guide separates the slider, tiles, bubbles and letters.
Day 2 · Night
Night Time Duties. William gives you the Golden Timepiece. Inspect the three portraits for symbols: Aldous’s silver triangle with a horizontal bar, Alexandra’s bronze inverted cross and William’s gold wavy line. Put the matching colored bottles above those symbols to open the cellar route. Throwing the leftover animal parts over the balcony is optional.
Inspecting the Cellar. You can take only three tools on a visit. First use matches, spade and magnet: the magnet obtains a key, the spade uncovers a locked box, and the lit torch reveals a statue showing 8. Rewind at the statue. Take empty bottle, corkscrew and matches to collect oil in the middle room, ignite the trail and rock crack, and reveal 10. Rewind again. Take hook, weight and sledgehammer to open the right gate and make a bridge from the broken column. Set the timepieces on the final statues to 5, 8 and 10, matching the previously seen left, bird and cube statues. Take the Book and give it to Aldous to complete the night.
Day 3 · Morning
Looking for the Cat. Give William the Book and then the hammer. After the bust is broken, take the pebble and throw it at the log outside to make Rustie return. Look under the pink chair and then behind the bust; the cat goes back to the servant’s room. Petting it on Kate’s lap before speaking to her is optional.
Assisting in Alchemy. Aldous’s note points to the hunting painting: interact with hat, rifle, bear eyes, crow to reveal the lab entrance. Decode the symbol board, open the bottle cabinet with 2451 and the left/right floor box with L L R R L R. Prepare oil, acid, blood, juice and the egg. The elixir recipe is egg first, then one juice, one acid, one oil and three blood. Pour some into Aldous’s glass, then give him the whole bottle when he asks; the second action completes the transformation and task.
Day 3 · Afternoon
Unforeseen Maintenance. Gather the two chair pieces, glue from the cat, and the broken bust’s head. Glue the chair together, replace and repair the damaged pictures, repair the bust, restore the loose balcony rail and close the stove cover. When the visible damage is repaired, Kate opens the kitchen. This is a later assignment, distinct from the Day 1 Small Repairs achievement.
Preparing Dinner. In the kitchen, collect the knife, wood and potatoes; light the oven. Obtain onion and shrimp from the cupboard, tomato and oil from the bottle puzzle, and a mushroom from William at the window. Add the soup ingredients, arrange the cake toppings to cover the holes and take a slice. Ring for Aldous. Start the potato test with the center potato and use the marks and affected part of his face to choose each next potato. Feed him cake and soup, then use the spoon on the servant to enter the hallucination.
During the hallucination, keep interacting with the changing figures and objects: William’s hat, coffee, champagne and Book; Alexandra’s clothing; the coachman; the blood moon; James’s basket; Aldous and the elixir; Kate’s cleaning scene; then the injured Aldous. When the scene returns to the kitchen, talk to Aldous about the stolen elixir.
Day 3 · Evening
Dressing Up for Dinner. Collect two glasses and Kate’s tray. Open the wine box with 1643. Gather ties, Alexandra’s necklace and James’s hair ribbon. Use the hunting painting’s hat twice, crow, rifle pattern for Aldous’s rifle and bow tie; retrieve William’s revolver from the fifth stair counted from the bottom. Move the figures in the house painting so the family portraits return to their proper positions. Their new symbols let you arrange the cellar bottles and obtain Sacred Cloth and Sacred Water. Use these with James’s basket, then finish clothing the adults and baby.
Serving Dinner. Give Aldous onion and broccoli, Alexandra bread and rabbit ear, and William fish head and bacon for the appetizer; fill all three glasses with wine. Follow William’s dropped-glass note for his wine. For the main course, give Aldous potato and broccoli; William potato, broccoli, carrot and meat; Alexandra two meat portions and a carrot. Mirror the harp’s demonstrated strings by playing the corresponding string from the opposite end.
For dessert, Aldous gets two cheese portions; Alexandra gets the yellow-centered chocolate; William gets the three remaining treats that are neither that chocolate nor the cheese. Finish the speech, hand Aldous the rifle and William the revolver, then pick up the bread knife and cut the chandelier rope. The fall begins The Departure.
Day 3 · Departure
Show the final escape and ending steps
Remove the fork from Aldous and the broken glass from William. Collect dripping water in the glass and give it to Aldous for a cloth. Bandage William’s wound, use the fork on his other injury for meat and give the meat to Rustie behind the gate for a hairpin. Turn the pin to the angle that makes each lock screw rattle, hold it there until it falls, and repeat for all four screws before sliding the latch.
Move the plank, collect the flint near the large column and light the torch. Use the next plank as a bridge. The new statue clues are 3:00, 8:00 and 5:00, distinct from the earlier cellar’s 5/8/10 sequence. Continue to Alexandra and take James when Kate interrupts the feeding. After the cave-in and elixir sequence, follow the white light to the coachman, hand over James and enter the carriage. Close its curtains to reach the credits.
For the meaning of the final transformation, open the ending discussion. Continue after the credits to receive Kate’s letter and use the notebook for missed achievements or the secret-clip clue chain. Those are post-game objectives rather than another required chapter.