
Open the hatch after the night watch
Complete Kate’s night watch: ring the bell for an anomaly and extinguish a candle only after a wholly normal patrol. When all three candles are out, speak to William about the scroll and take the Walking Stick he provides in the original Day 1 guide.
Use it on the ceiling hatch in the corridor near Aldous’s room, pull down the ladder and climb. The lantern uses the matches from your earlier breakfast route; it is not unlocked by the gold habitat box.
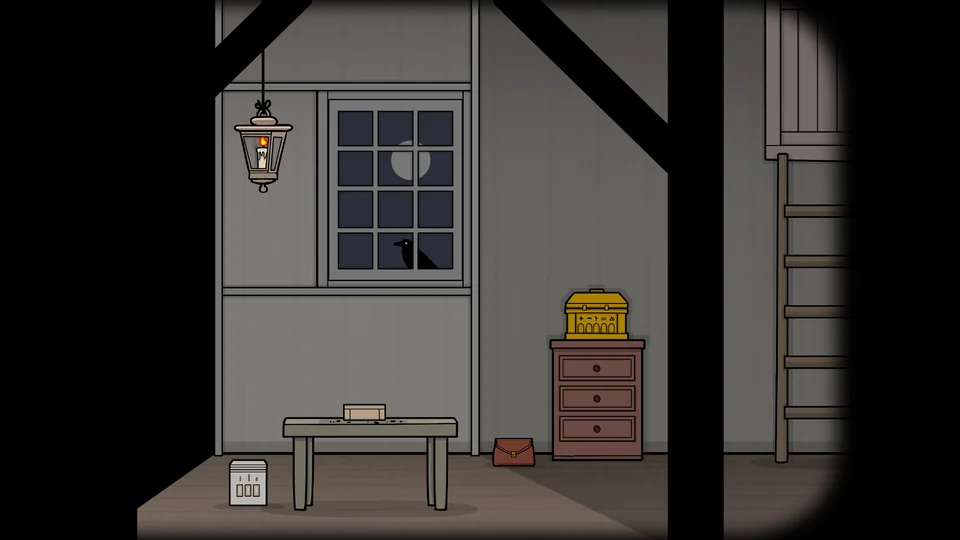
Sort the desk and light the lantern
On a narrow screen, scroll the table sideways to read all columns.
| Compartment | Contents |
|---|---|
| Large left | Shapes / broken shards |
| Top | Flesh, eye and bones |
| Bottom | Leaves and twigs |
| Small right | Fingers |
Take the candle that the sorting puzzle releases. Insert it into the hanging lantern and light it with matches. The dark area to the left is now accessible; take its animal statue and open the figurine story box.
If previously collected matches or other objects have disappeared, changing the constellation input does not repair that state. Check for updates and follow the save-problem support branch before resetting your progress.
Match the eight lines with figurines
On a narrow screen, scroll the table sideways to read all columns.
| Line | Arrangement |
|---|---|
| Young Vanderboom | One blue-shirted man. |
| He marries | Man and woman together. |
| He builds a house | Square with triangle on top. |
| Three children | Two blue-shirted men and the woman. |
| He rides to war | Horse with the armed man on it. |
| Shot in the back | Remove the horse; keep the armed man and put another man in front of his gun. |
| Mother goes up the mountain | Triangle, with woman at its top. |
| She sees a large cube | Keep the woman, remove the triangle and add the square/cube. |
Open the shaking cube for a small key. Use the key on the purse for another statue. Open the dresser drawers for a further statue and one ladder rung. The constellation box provides the last movable statue.
Read the three normal window patterns
At the window, move the clouds left and right until each of the three scene states appears. Copy the exposed stars into the matching hotel, moon or water setting on the silver box.
On a narrow screen, scroll the table sideways to read all columns.
| Scene state | Pattern |
|---|---|
| Hotel windows lit | 5 stars: a square with an extra spur toward the upper left. |
| Moon turns blood red | 3 stars forming a triangle. |
| Water turns black | 6 stars: a square with two opposite spurs. |
The matching exposed stars are the shape reference if a rotated pattern looks similar. After all three are correct, take the statue from the box. If the crow appears at the window, click it to obtain the optional Chase away the Crow reward.
Match habitats and repair the ladder
Fill the gold box’s empty slots
Put the four collected animal statues into the gold box. Include the goat already present when matching all five animals.
Match each home
Moth/butterfly → flower; bird → cloud; monkey → tree; fish → water; goat → mountain.
Checkpoint: The box opens for the special scroll and the second ladder rung.
Repair the ladder
Put both rungs on the damaged ladder, climb and slide the upper hatch open.
Checkpoint: The masked figure appears and Day 1 finishes.
Continue to Day 2 Morning. The scroll becomes part of William’s wake-up assignment; there is no need to enter the later hidden-letter constellations now.
The later hidden-letter visit
After the ending, Kate’s letters send you back to the attic. That letter-based box input uses four castle stars, a two-star moon line and a three-star water triangle, rather than the normal 5/3/6 window observations. Use the secret-clip attic note only when following that post-game chain.